Contact Us

If you still have questions or prefer to get help directly from an agent, please submit a request.
We’ll get back to you as soon as possible.

Please fill out the contact form below and we will reply as soon as possible.

  • Contact Us
  • Home
  • VTube Technical Articles
  • VTube-LASER

Measured Tube Average (MTA)

Written by Michael Cone

Updated at January 27th, 2026

Contact Us

If you still have questions or prefer to get help directly from an agent, please submit a request.
We’ll get back to you as soon as possible.

Please fill out the contact form below and we will reply as soon as possible.

  • VTube Update Articles
  • VTube Technical Articles
    VTube General (STEP and LASER) VTube Reports VTube-LASER VTube Configuration and Maintenance VTube-STEP VTube Installation SOLIDWORKS Configuration VTube Videos VTube Cloud License Server VTube Communications
  • Benderlink Software
  • Benderlink Hardware
  • Bending Terminology
  • Partners
  • CNC Bender ProControl
  • Bender to XYZ
  • General Software Topics
  • Utility Software
  • Windows Technical Articles
    Cable Specs
  • Measuring Devices
    HEXAGON Articulated Arms Metronor
  • TubeCAD
  • Benderlink Update Articles
  • Uncategorized
+ More

Table of Contents

What Does It Do? Customer-Requested MTA Automation The MTA User Interface MTA Buttons in Tube Measure Control Alternative Ways to Show the MTA Window Example MTA Solution From a Customer


What Does It Do?

The MTA feature allows operators to measure the tube, rotate it, measure it again, rotate it, etc. - as many times as they want to. It's super easy to do, and it can significantly impact returning reliable tube shape data for large-diameter tubes.

  • See Video 76 in VTube-LASER Videos to see MTA in action.

Customer-Requested MTA Automation

MEC, Inc. requested this feature after they performed several weeks of tests measuring large-diameter tubes.
 

MEC Inc. (Mayville Engineering), one of our customer-reference companies, performed several tests on large-diameter tubes to confirm that measuring both sides of the tube has a positive impact on measuring tube shapes.

They requested that we make creating averaged (hybrid) tubes easier for their operators. We agreed this was a great idea, so we developed the MTA feature to answer the need.

The MTA User Interface

The new MTA window was added (see right).
 

  • Press the number of previous measures to average, then press BUILD to create a new Measured Tube representing the averaged part.
     
  • The new measured tube in VTube-LASER is immediately the averaged tube. Use this tube shape to align with the MASTER data.
     
  • ANY NUMBER of measures can be averaged together.
     
  • MTA uses the Tube Data Storage feature in VTube-LASER to store every measure used in the measured averaged part. This means you can review every step MTA took to build the averaged tube.


MTA Buttons in Tube Measure Control

During measurement, buttons at the bottom of the Tube Measure Control window make using the MTA feature very easy.


Alternative Ways to Show the MTA Window

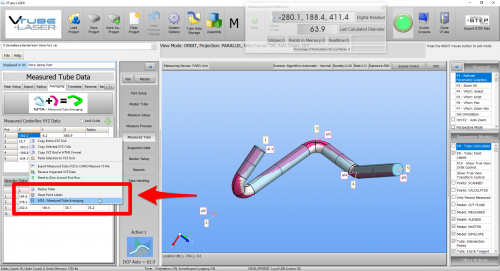
  1. The Averaging tab menu in Measured Tube Data has an MTA button.
     
  2. The Measured Tube Data XYZ grid popup menu has an entry for displaying the MTA window.
     
  3. The Data Handling Menu / Internal Data tab menu has an MTW window button.
METHOD ONE
METHOD TWO
Mta averagingpopupmenu.png.png

METHOD THREE

Example MTA Solution From a Customer

A customer had an application that measured the same tube on different sides and obtained varying end lengths of up to 3.33 millimeters (0.131 inches). The solution was to use MTA (Measured Tube Averaging).

These were suggestions to the customer for this issue.

1) Is the End Scan Flier filter on? If it is OFF, I recommend you start by activating that filter. Read this: https://advancedtubular.helpsite.com/articles/121109-vtube-laser-end-scan-flier-filters

2) If you still see a difference after the filter is activated, the problem could be cylinder deformation. The solution to deformation is MTA (described on this page).
 
3) Finally, the difference could be caused if the end cut is not square to the centerline and the operator scans different parts of the end wall. I doubt that this is the issue. To eliminate this issue, measure the end with the ball in one part of the wall.

The customer proved that MTA was the solution.


tube average

Was this article helpful?

Yes
No
Give feedback about this article

Related Articles

  • D of Bend (DofBend)
  • VTube Diameter Cut Plane (DCP)
  • VTube-LASER Shallow Bend Measure Process

Copyright 2026 – Advanced Tubular Technologies.

Knowledge Base Software powered by Helpjuice

Expand